Evil Twin
Size: 11 gal
Efficiency: 70.0%
Attenuation: 75.8%
Calories: 223.88 kcal per 12.0 fl oz
Original Gravity: 1.060
Terminal Gravity: 1.016 (0.995 - 1.035)
Color: 18.39 (1.0 - 50.0)
Alcohol: 6.3% (2.5% - 14.5%)
Bitterness: 42.8 (0.0 - 100.0)
Ingredients:
23 lb Pale Ale Malt
1.5 lb Crystal Malt 40°L
1.5 lb Munich Malt
1 lb Victory® Malt
1 lb Crystal 120
.5 lb Pale Chocolate
1 oz Centennial (10.0%) - added during boil, boiled 20 min
1 oz Amarillo (8.5%) - added during boil, boiled 20 min
1 ea Whirlfloc Tablets (Irish moss) - added during boil, boiled 10 min
2 tsp Yeast Nutrient (AKA Fermax) - added during boil, boiled 10 min
2 oz Centennial (10.0%) - added during boil, boiled 10 min
2 oz Amarillo (8.5%) - added during boil, boiled 10 min
2 oz Centennial (10.0%) - added during boil, boiled 0.0 min
2 oz Amarillo (8.5%) - added during boil, boiled 0.0 min
Notes
Directions: Single infusion mash at 154F (68C) using a ratio of 1.3 quarts water to 1 pound of grain. The 90 minute boil enhances the blood-red color. It also adds a touch more melanoidin and caramel notes. Cool the wort quickly after the last hop addition to retain as much hop aroma as possible. Optionally, dry hop with more Centennial or Amarillo if you’re a real hop monster. Carbonate to no more than 2 volumes and serve at 45 to 55 F (7.2 to 12.8 C).
Results generated by BeerTools Pro 1.5.2
 It was an interesting brew day. Everything seemed to go well, and then the unexpected happened. See the pics below for details.
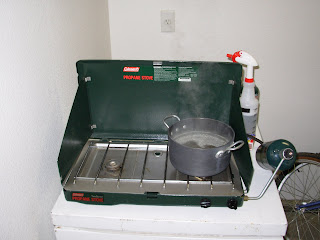
 I found a great new place to make the yeast starter: in the garage. The camping stove works great and the house doesn't end up smelling like beer.
 Ten ounces of hops waiting to go into the boil.
 My new "hopsock" that I built out of a small piece of aluminum dowel, a 3 inch PVC pipe adapter, a 4 inch hose clamp, and a 5 gallon paint strainer. The hopsock goes in the boil, the hops go into the hopsock, and I don't get leaf hops clogging up my ball valve when I'm draining the wort!
 So, at the end of the boil I put in the wort chiller and noticed that the "in" side had a small leak. No big deal since it's dripping outside the kettle, right? Wrong! This little gem burst apart spewing water all over the garage but didn't get any in the boil kettle. Whew!
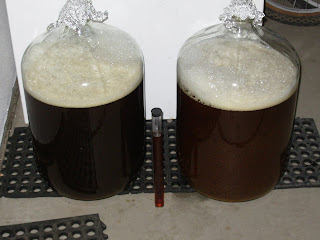
 10 Gallons of wort in glass and the hydro sample (that tasted absolutely delicious!). If you look closely at the hydro sample you can see the red color that this beer will have. Can you tell which carboy got the bottom of the brew kettle nasties in it? ;-)
Three weeks until fermantation is finished and we can put this lovely elixer on CO2 to carb it up!


